Sunday 15 September 2013

Flames of War skirmish report

 
After both sides occupying high ground over a ruined town, 

German reinforcements engaged American Paratroopers in fields. 

The Germans inflicted light casualties in hit and run raids but then failed to press home the element of surprise or to use a nearby platoon gone to ground in a wood to overwhelm the paratroopers. 

Then those Eagles accurately reduced the German forces by 66%, pinning them down. Quickly the Eagles mopped up the stragglers. The skirmish ended with the Screaming Eagles happier than Das Reich.

Monday 5 August 2013

Getting entrenched - Building trenches for Flames of War FOW 15mm part 1

On the back of an amazing trip to Normandy, to see the D-Day landings, I'm beginning to model a little of the Atlantic Wall myself. There are some great Flames of War scenarios so I hope my trenches get well used.

I'm hoping to make trenches, bunkers, artillery and AA batteries, but let's start with a simple set of six one foot (30cm) trenches.

I'm basing the trenches on 6mm MDF. After some chats on the ferry home with my gaming mate, it's clear that the trenches must be wide enough for a medium Flames of War base to sit with its longest side parallel to the length of the trench. 


The trench begins with polystyrene strips being glued down with PVA. I used a marker to ensure there's enough room for a Flames of War base - allowing extra for the filler and the wood I'll use for the trench sides. 


I then added the brown window filler to the edges of the board, covering the outer side and top of the polystyrene. Of course I sloped the attackers edge of the section, so hopefully it'll make it look good for skirmishes. On two of the sections I've added exit points, another two have ends that I hope are big enough for a medium base to face out - seems like a good place for an MG42.


On the picture above I've also added kebab skewers on the sloped side, they may end up with barbed wire on them.


Once that was mostly set I put more filler in the trench. Into that I put planks, otherwise known as coffee stirrers. I built up the outside walls with three, the floor has various sections. The filler makes for excellent mud everywhere. The only thing I currently don't like is the thickness of the 'planks'. You can cut them down, I did a couple, but I already have very impressive Stanley knife scars, so I'm
reluctant to do that too much.

Originally I added a number of vertical pieces of 'plank' that held the horizontal 'planks' in place (on the real sections we saw in Normandy). This looked great, but the width of the trench became too narrow for the medium base. Using a wider MDF base would allow for more room in the trench, but the whole thing would take up more room on your gaming board. In the end I removed all of them except at the ends of the sections. 

I hope to sandbag the edges of the trenches - I'm going to get very bored making all then from green stuff! The main consideration there is ensuring the trench sides don't get too high and stop the soldiers (and their arms) seeing outside the trench.


Sunday 5 May 2013

Hedge clumps, smoke markers etc Part 1 - (for Flames of War FOW 15mm)

Over on the Flames of War forum there was a discussion about making explosion markers (http://www.flamesofwar.com/Default.aspx?tabid=126&aff=52&aft=554059&afv=topic). I haven't got there yet, but as that idea got me thinking about a load of little bits for my boards.

Therefore I've used that idea and made some hedge clumps and smoke markers. I might develop this idea some more, but for now here's what I did.


I purchased some 2mm thick, 20mm diameter MDF pieces. These are available on ebay for only a couple of pounds.


On each of them I added some brown window putty. As I was experimenting I tried a few different finishes with the putty, but the main style I wanted was a cratered finish. Seems like craters are likely when shells and artillery go off and also it makes it very easy to put something in the crater because the crater edges cradle it and hide the glue.


 They dried and then I spray painted them with Plastikote brown. As these markers are very small I'm not going to paint them again to get a dry brushed effect. 


I took two different packets of Javis clump foliage. It's hard and far less malleable that the Woodland Scenics, so it's great to have a use for it because I couldn't seem to use it to make the much larger explosion markers. I put a good splodge of PVA in the crater, added the clump and then waited for it to dry. Then today I added a second liberal coat of PVA, just over the top to seal the hedge down.

I think these will make great little pieces of randomly placed scenery on a board. Put a few of them close together and they might be able to break line of sight between infantry teams.

Then the other type of marker I made this time are smoke markers. Another good blob of PVA goes in the crater well, then a lump of pillow filling, rolled and shaped. Using the pillow filler isn't my idea, I saw someone using it on Youtube for smoke markers.


I hope these work out, I literally finished making these before dinner this evening. I'll try and get some photos of these on a terrain board or in use soon.


Monday 29 April 2013

Low hedges and stone walls - (for Flames of War FOW 15mm)

Making your own low hedges or stone walls couldn't be easier. I got my inspiration for these from a game with my mater Coops. He'd been using the cork tile edging strips and some wooden beading to make some fences and hedges.

Here's my homage to him. I bought cork edging strips and wooden beading from Wickes, shaped like a capital D on it's side, but flat on the round of the D so the cork strips glue on properly. I'm not advertising them because I get a deal, but they are cheap and you get plenty, at least when it comes to low hedges and walls.

I cut the raw materials into foot long strips for the unbroken sections. Others I cut at 5" (12.5cm ish), in order to make entry or breakthrough points like you'd see in any fence or wall from a road into a field or other area.


I glued the wood and cork together, once dried I customised my hedges. I held a section length ways in my hand and took a craft knife to the top edge of the cork and scraped it along, breaking bits of cork off to create an uneven finish, just how hedges grow. You could do the same with walls, but I decided not to.

Once I was happy with that I undercoated the sections black. In the top left hand corner you can see the first one of the entry sections I ended up making.

In the picture below, which is all hedge, you can clearly see the effects of scraping the edge of the cork. Then it was time to paint. My friend Jason says I use too many colours. Well, we've got to keep Vallejo in tapas haven't we?


This picture shows hedges in the stages of being painted, from top to bottom. The black undercoat could easily be replaced with brown, but I think the hedges benefit from a dark shadowed centre.


I used Vallejo 979 german camo dark green, 874 russian green, 890 reflective green for my shaded greens.


For highlights I then applied 988 khaki, 983 flat earth and 818 red leather (aiming for a berry or red leaf effect).

In one or two places I used little bits of cork to create a crack through the hedge or wall line. 


For the stone walls instead of the paint, once undercoated I used Rust-Oleum Textured Stone effect 400ml spray paint. There are some colour options here, it's up to you which one you use.

This is a picture from a small infantry skirmish, using a mixture of hedge and wall. Coop's US are about to come through the wall and kick my backside!


These last shots are simply some staged pictures once I'd finished flocking the edges.


I've also made some road to go underneath or next to (depending on how narrow you want the roads) the low hedges and walls.


The breakthrough points are relatively easy to make. Use the 45 degree cut cork and create the opening.


For these I used some filler to create tracks and the raised hump you always see between muddy tracks.


Then I added bushes and foliage that stuck up higher than the flock. Flock on. All done!


Thursday 18 April 2013

Terrain squares - Crossroads Part 1 (for Flames of War FOW 15mm)

I had an idea a few weeks ago to make some larger pieces of terrain.

I wanted something that could go in the centre of a table or reversed and put on two edges, like a route in for resupply troops. I wanted it something that would create quite a few blindspots and also have enough room on it for an objective marker.

I picked up some 6mm MDF and cut into 6 squares, 30cm square with rounded corners. Someone asked me why I did rounded corners. I honestly can't say other than that's what teams are based on.

Once I'd thought it through I marked out the idea, pictured above. The path of the tracks is obvious and the rectangles and arrows are going to be small hills large enough for a tank or two to hide behind. 
 

The next stage was messy - which is clearly why I chose to do it on the cream carpet in our lounge! I took some polystrene, rescued from the Grandparent's new washing machine deliverers. I cut it into chunks according to the rectangles and arrows I'd drawn on the boards. I then glued them up with PVA and left the boards to dry.

Once dried I covered them in the mouldable brown window putty I use on all my terrain. A large tube for 99p, can't go wrong - even when you use two or three tubes to cover two of these boards.
.

 The majority of the board only had a fine skim of the window putty, perhaps 2-3mm. I then textured it over the top of the polystyrene - the same thing I do with making my Bocage (a blog or two for another day). Then with some coffee stirrers (tracks), a knackered fork (furrows), a deliberately broken kebab skewer (for little indents and marks) and anything else I like to use to make the tracks and other textures.


I had originally thought I could create the textures with the one of my tanks, press it and move along. Nope! All that did was transfer loads of brown goo on to the treads. It might work when nearly dry, but I went another way.


Time to let it dry and see what it looks like before painting!


Autumn Trees Part 2 (for Flames of War FOW 15mm)

Last time I showed the start of my trees. I said this time I'd talk about finishing them off.

The first part of that involves adding water to those basis with ponds. I used the filler to create the edge of the base, added rocks and bits of coffee stirrers for a small pontoon.

I used Woodlands Scenics Magic water to create the water. I'm aware that you can buy another product called Water effects, both Woodland Scenics and Vallejo sell them. This allows you to create extra effects on the surface of the water. 

I've ordered some of that to see how it works. It is also possible to add texture to Magic water, a toothpick works fine if you can be around while its drying. It's possible to mess it up at various stages in the drying process in order to create effects..
 I think on reflection I made a mistake with the base under the water. I wasn't sure what the final finish would be so I tried tan and blue, it looks decidely iffy. Next time I'll do better!

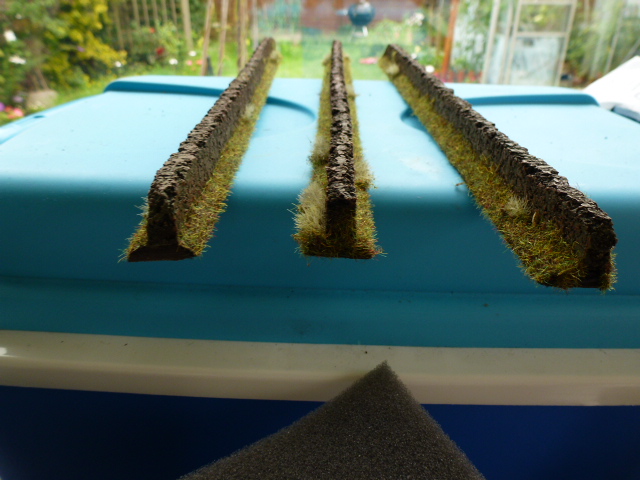
Right, back to painting and finishing these pieces of scenery. If I'm leaving alot of earth on show I do multiple colours dry brushed on. If I'm using a lot of flock then I opt for a dark brown and get the flock everywhere.
 This first base with two trees on it, has a felled trunk along the front, plus a few rocks pressed into the filler, they have been painted around.
 I've created a worn out fence line along the edge of this base. The rest of the base is heavily flocked.
 This pair of trees was raised up a little on the base and more putty added to create a natural channel. In Flames of War infantry can pass between man wide gaps in buildings, so I thought this was quite a nice, if superficial scenery effect. Actually as I type this up I can see that the earth around the tree needs some dry brushing to finish it off well. I'd better get on that too!
 The same base from the side.
 I've painted up the stones a little on this base, I like the effect, it's almost snow like. Also a couple of bits of kebab skewer make great stumps.
 My flocking process is very simplified. I mixed up lots in advance of painting my Germans, and it's getting used everywhere. There is standard flock in there, some grit, small random particles. Lately some Norwegian moss has crept in there. What I feel I should have done is kept the recipe!
 Soon I'll run out, but I hope all my Germans will be done then. The Russians will have to have their own blend. I've simply taken a few pictures to finish off. I add my flock in the following way. 1) Brush plenty of PVA on, a good coating, but you don't want it running off, just running in.
 2) If you're flocking a bunch of models then brush on all the PVA.
3) After it's well coated, I leave it for 5 min, then I start adding the flock.
 4) I sprinkle it on, rubbing it between my forefingers and thumb as I go - just like breaking up a stock cube.
 5) Once it's well coated I turn the model over and tap, tap, tap. Loose flock falls off and lots that's sticking starts to stand up.
6) I repeat the adding process until I'm happy with the amount on there.
7) Let dry and enjoy when you play.
If you read the last article on my blog you'll know it's taken me two months to add this part 2. That isn't because I'm slow at making trees, it's because I've been lazy in adding articles because I've been making up some really lovely pieces of scenery, some 30cm (1ft) squares. More on them soon!

Sunday 17 February 2013

Autumn trees Part 1 (for Flames of War FOW 15mm)

As I'm working towards an autumn themed battlefield I asked for some model trees for Christmas. My lovely wife bought me a large bag. Shortly afterward I took some large Flames of War sized bases, plus some generic round bases from a show, and I started working out some ideas in my head.
The idea was to create:

1) Stand alone trees
2) Trees that would work together in rows
3) A pond or two
 For the first part of my basing I'd relied on polyfiller, the cheap homebrand ones in places like B&Q. Since then I'd had a moment where brown window sealant caught my eye.

I bought a long tube of it from the 99p store, whacked it in my caulking gun and made a sampler to see if it did what I wanted.

I personally like everything about it as a basing material. It has a number of advantages over polyfiller:
 - it weighs less,
 - it's much more malleable,
 - it looks more durable,
 - it won't crack (I think)
 - it takes paint, stones or other adds ons really well
Simply - take a base, add a triggerfull of the brown caulk.

Create the shapes you want:
 - a ring of it for a pond (adding stones around the edge, or even a mini pier as you can see in the bottom left corner of the picture below
 - a layer deep enough to submerge the roots of your trees
 - a bank on one side of a base, or a gully
 - a fence line with either small pieces of kebab skewer or coffee stirrer sticks
 - an abandoned MG nest, sandbags as an OP for a sniper team
 - kebab skewers for old tree stumps
 - an equipment store

The limits are really what you can imagine and create.
 Putting two of the type of trees I had on to a single large base was a squeeze. My solution was to put them in the corners. With a tree in each corner of a base you can make a row of bases to create a thick tree line which I you can designate as concealment. The only thing you've got to do is if you're using top left and bottom right, then stick to it. Otherwise if you put one in the bottom left and top right then they won't sit flush with each other. I did a set of each in the end, plus the ponds.
The caulk is dry within 12 hours. I guess you can add stones etc at any point during those hours.

Regarding tank tracks - I found with polyfiller and this caulk, that tank tracks can be added, but you may end up with some of the filler/caulk on your tracks if you indent them too early. I don't have spare sets of tracks, and I don't want gunk left on my tanks, so I tried something else. A thin coffee stirrer (or a thick one cut or sanded down) and some patience and you can create sets of tightly packed parallel lines which represent tank tracks.

Next time painting them