Sunday 17 February 2013

Autumn trees Part 1 (for Flames of War FOW 15mm)

As I'm working towards an autumn themed battlefield I asked for some model trees for Christmas. My lovely wife bought me a large bag. Shortly afterward I took some large Flames of War sized bases, plus some generic round bases from a show, and I started working out some ideas in my head.
The idea was to create:

1) Stand alone trees
2) Trees that would work together in rows
3) A pond or two
 For the first part of my basing I'd relied on polyfiller, the cheap homebrand ones in places like B&Q. Since then I'd had a moment where brown window sealant caught my eye.

I bought a long tube of it from the 99p store, whacked it in my caulking gun and made a sampler to see if it did what I wanted.

I personally like everything about it as a basing material. It has a number of advantages over polyfiller:
 - it weighs less,
 - it's much more malleable,
 - it looks more durable,
 - it won't crack (I think)
 - it takes paint, stones or other adds ons really well
Simply - take a base, add a triggerfull of the brown caulk.

Create the shapes you want:
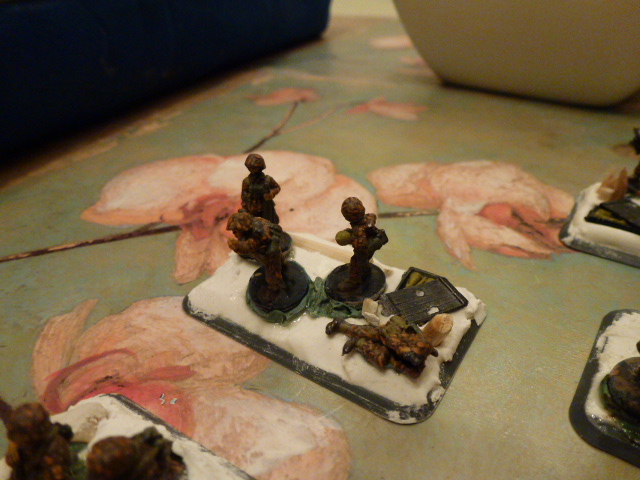
 - a ring of it for a pond (adding stones around the edge, or even a mini pier as you can see in the bottom left corner of the picture below
 - a layer deep enough to submerge the roots of your trees
 - a bank on one side of a base, or a gully
 - a fence line with either small pieces of kebab skewer or coffee stirrer sticks
 - an abandoned MG nest, sandbags as an OP for a sniper team
 - kebab skewers for old tree stumps
 - an equipment store

The limits are really what you can imagine and create.
 Putting two of the type of trees I had on to a single large base was a squeeze. My solution was to put them in the corners. With a tree in each corner of a base you can make a row of bases to create a thick tree line which I you can designate as concealment. The only thing you've got to do is if you're using top left and bottom right, then stick to it. Otherwise if you put one in the bottom left and top right then they won't sit flush with each other. I did a set of each in the end, plus the ponds.
The caulk is dry within 12 hours. I guess you can add stones etc at any point during those hours.

Regarding tank tracks - I found with polyfiller and this caulk, that tank tracks can be added, but you may end up with some of the filler/caulk on your tracks if you indent them too early. I don't have spare sets of tracks, and I don't want gunk left on my tanks, so I tried something else. A thin coffee stirrer (or a thick one cut or sanded down) and some patience and you can create sets of tightly packed parallel lines which represent tank tracks.

Next time painting them


Friday 15 February 2013

Painting SS-Scout Tank-hunter platoon Schwimmwagen GE819 Part 3 (Flames of War FOW 15mm)

I've looked at painting the Schwimmwagen vehicles up in the last two posts. Had a couple of really useful tips via the Flames of War forum (painting the wheel hubs yellow and toning down the metallic tools by mixing a silver colour with dark grey), and I need to see if I can use them, either now as a post pain fix, or in the future.

What I've put in the pictures here is the basing of the men.

 My biggest struggle in coming to Flames of War is arranging men on bases. Well maybe that and those moments where two fiddly parts on a vehicle wont superglue together, but my fingers will (thank goodness for green stuff!)

I've found members of the Flames of War forum incredibly useful in pointing me in the right direction. With small platoons it is relatively simple. You can find the item in the shop and see how the guys at Battlefront display the men. You can also see squad pictures in the game books and diagrams that give you the right understanding of the number of men a squad has in it, and whether those men are on one base, or like my SS infantry are across two bases (one with four men on it and one with five).

 Some kebab skewers make good tree stumps, plus kitty litter for boulders and spare bits from a German stowage blister. Green stuff also means you can make extra barrels, packs and storage crates. I've also done a lot of customisation work on my Nebelwerfer infantry to make them into what I see as SS units instead of Heer.

 Anyway, off topic. In these pictures I've based my men on a generic polyfilla. I found the cheaper ones better because they are more coarse and give a rougher finish.

I have to admit to making a mistake with the basing of these. For all my SS infantry I score the bases with a craft knife in a diamond pattern. I attached the men, then very carefully with cut down coffee stirrers (your friend) applied the filler. This time I got carried away with more detailed bases and adding the detritus of war, and forgot that putting the men on was a problem.
I had an idea to fix it, but didn't use it. I thought you could use a toothpick and dig out the base disc, so the men would go into a hole in the filler. I think it's simpler to do it right the first time! Each man had a little superglue and greenstuff to hold them down in the end.

Despite the mistake I reckon the end product with the men is good enough. I added more filler and textured it. Then when it dried I painted up the bases with eight layers of acrylic. I'll do an article on that, and why I like it, at some point.

In this final picture you'll see I haven't flocked. I'm in two minds over that and may still flock small areas on the squads. If you're wondering what the two larger round bases are at the top, I had a go at objective markers, with lots of tank treads in them. They are both meant to represent a rough store area where Germans may have dumped items. I love the fact we can use our imagination for the battlefields. The barrels of my Nebelwerfers are sneaking in the bottom of the picture, but that's for another time too!


Thursday 14 February 2013

Painting SS-Scout Tank-hunter platoon Schwimmwagen GE819 Part 2 (Flames of War FOW 15mm)

Following on from the last post, here are some closeup shots of three of the Schwimmwagen. At this distance, which is about 4cm away, the detail is overly close, which I think takes away a little from what they look like on the battlefield.

Anyway some painting information - I've base coated the green stuff additions in Middlestone, same as the body, but then tried to do some contrast with Vallejo Khaki 988.

 I haven't flocked these bases yet, but as I'm using an autumn uniform scheme for my SS, I've got a suitable mix of autumn flock to put on (eventually)
 The helmets are painted according to the colour scheme you're using for your uniforms - I'm using Oak leaf autumn so each helmet gets the three colours for that camo scheme - info I don't have to hand but it's definitely in the Cobra source book and I'm sure on the flames of war website.


Lots of detailed camo work can be done with 5/0 or 10/0 brushes. I've also seen an article in one of the newer FOW books about triangular shaped spots on late war Panthers - I've tried something else which I'll write about when I put up my Panther painting articles.


I put the men into the vehicles before varnishing them. Each vehicle seems designed for 3 men, including at least one with a panzerfaust. The pictures below are prevarnished, but the men have been dipped in quicktone, hence their slightly shiny finish. Once finished off with two coats of matt varnish they lose the shiny edge.

 The other thing I did on these vehicles was decals. There clearly were some hard and fast rules in the real world. I doubt my solution is anyway authentic, but I thought it out and I like it. Each vehicle in this platoon has a German star on the bonnet and I've put a SS 2nd Das Reich logo on the driver's door.


I'll put up a Part three to this platoon and show you some of the stuff around the basing of the infantry units, perhaps a bit of painting info too.

The nice thing about a platoon like this is that there's no assembly and it's a straightforward way into painting your army - some platoon or company boxsets are a lot more complicated that this!


Wednesday 13 February 2013

Painting SS-Scout Tank-hunter platoon Schwimmwagen GE819 Part 1 (Flames of War FOW 15mm)

As I've been building up my SS army I saw the Painting SS-Scout Tank-hunter platoon Schwimmwagen GE819 and wanted one (even if it doesn't get a lot of battlefield use).

The four vehicles (Schwimmwagen) are quick to paint, and simple too in comparison to a tank - because there isn't as much fine detail or panelling on them.

Here they are front end on:


Here they are at the back:
Once seeing them I decided to use some two part moulding epoxy, often called "Green Stuff", to customise each one. For example on the rear of the second Schwimmwagen you can see the start of an SS infantryman's helmet above each wheel arch, and a camo net in the middle. I'm still getting to grips with using green stuff, but I think the limits of it are primarily skill based.

For painting the vehicles I'm using Vallejo Middlestone (882), with camo patches of Chocolate Brown (872) and Reflective Green (890). I've used small pieces of sponge to create the patches of the camo colours.

I'll finish this article off soon and show you the finished product.