Here's my homage to him. I bought cork edging strips and wooden beading from Wickes, shaped like a capital D on it's side, but flat on the round of the D so the cork strips glue on properly. I'm not advertising them because I get a deal, but they are cheap and you get plenty, at least when it comes to low hedges and walls.
I cut the raw materials into foot long strips for the unbroken sections. Others I cut at 5" (12.5cm ish), in order to make entry or breakthrough points like you'd see in any fence or wall from a road into a field or other area.

I glued the wood and cork together, once dried I customised my hedges. I held a section length ways in my hand and took a craft knife to the top edge of the cork and scraped it along, breaking bits of cork off to create an uneven finish, just how hedges grow. You could do the same with walls, but I decided not to.
Once I was happy with that I undercoated the sections black. In the top left hand corner you can see the first one of the entry sections I ended up making.
In the picture below, which is all hedge, you can clearly see the effects of scraping the edge of the cork. Then it was time to paint. My friend Jason says I use too many colours. Well, we've got to keep Vallejo in tapas haven't we?

This picture shows hedges in the stages of being painted, from top to bottom. The black undercoat could easily be replaced with brown, but I think the hedges benefit from a dark shadowed centre.

I used Vallejo 979 german camo dark green, 874 russian green, 890 reflective green for my shaded greens.
For highlights I then applied 988 khaki, 983 flat earth and 818 red leather (aiming for a berry or red leaf effect).


For the stone walls instead of the paint, once undercoated I used Rust-Oleum Textured Stone effect 400ml spray paint. There are some colour options here, it's up to you which one you use.
This is a picture from a small infantry skirmish, using a mixture of hedge and wall. Coop's US are about to come through the wall and kick my backside!

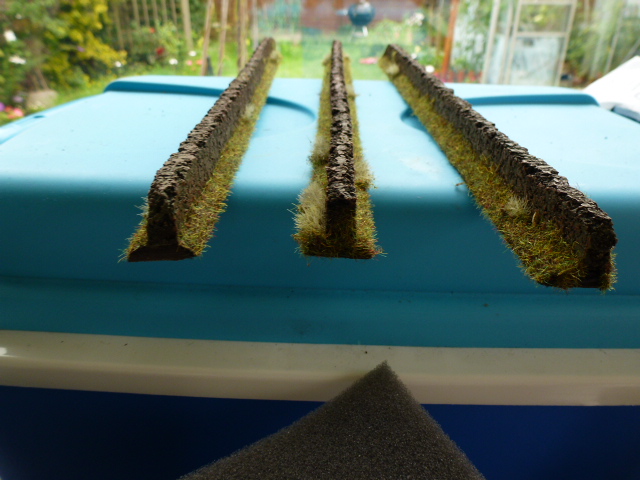
These last shots are simply some staged pictures once I'd finished flocking the edges.

I've also made some road to go underneath or next to (depending on how narrow you want the roads) the low hedges and walls.

The breakthrough points are relatively easy to make. Use the 45 degree cut cork and create the opening.

For these I used some filler to create tracks and the raised hump you always see between muddy tracks.

Then I added bushes and foliage that stuck up higher than the flock. Flock on. All done!

Very nice indeed thanks for sharing!
ReplyDeleteThanks Greg, it's great to have some feedback
ReplyDeleteDrybrysh your tracks with some metal paint, now its way to shiny and looks like it came right from the factory
ReplyDeleteBut it looks really good!
ReplyDelete